Contents
|
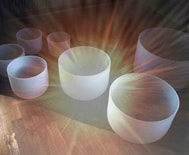
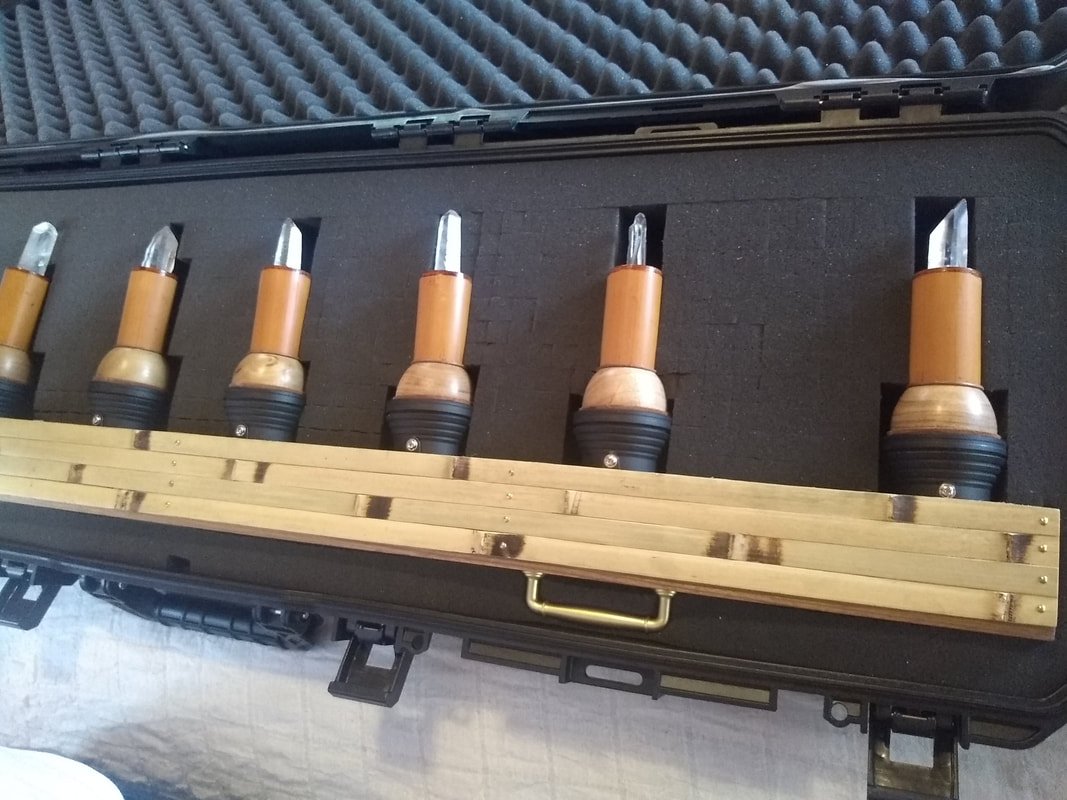
Solid travel case with crystal lights and bamboo / walnut beam.
|
2 portable posts
and 1 cross-bar. 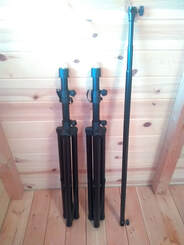
|
- 2 S-Hooks
- 2 Wire Cable - 1 25ft Extension Cord - 1 Power Supply (Transformer) - 2 controllers (1 to use and 1 extra) - 2 keys for travel case 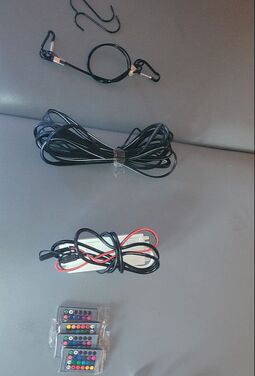
|
Stands - Step 1
|
Unpack the stands and crossbar. Please check all packaging, what might appear to you as padding could contain parts, accessories or screws.

|
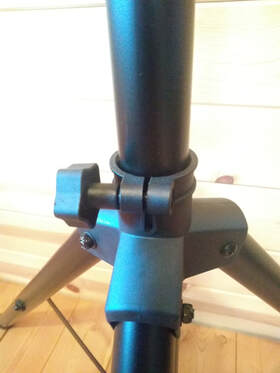
Loosen knob to pull and expand legs to about 30 inches for solid/firm stand.
|
Make sure both stands have the same leg space distance, to insure lights will hang level (step 4).
Tighten knob to a secure non slip setting. 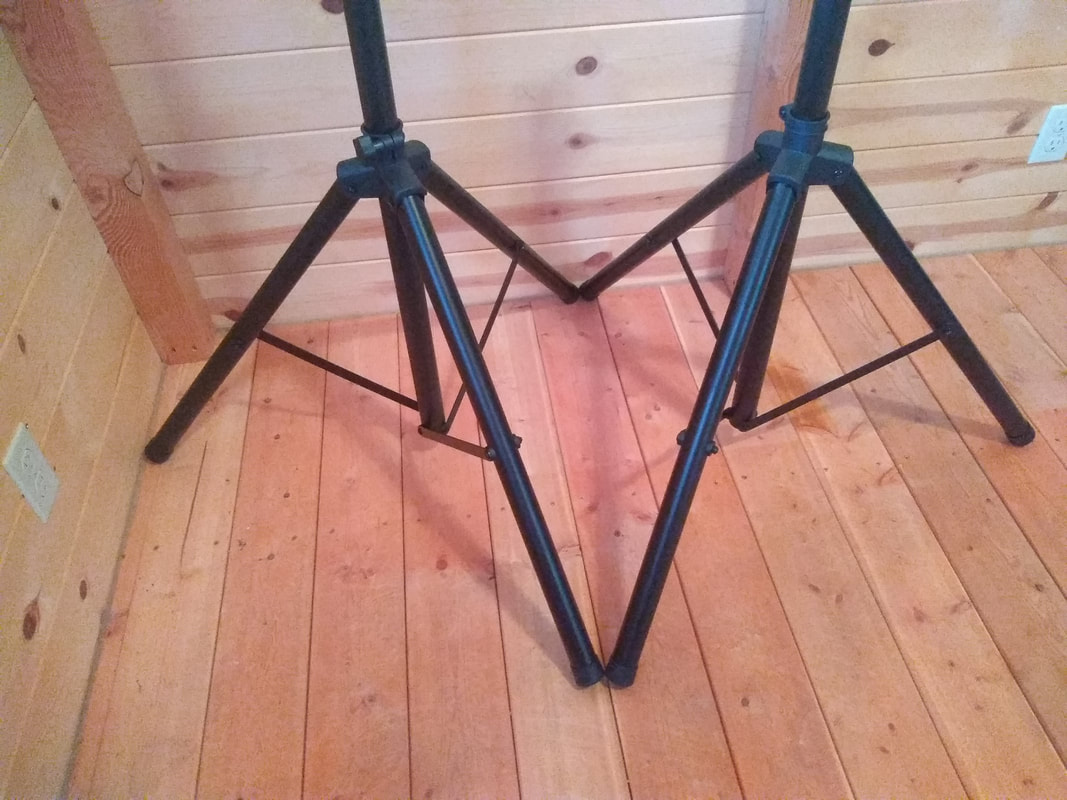
|
|
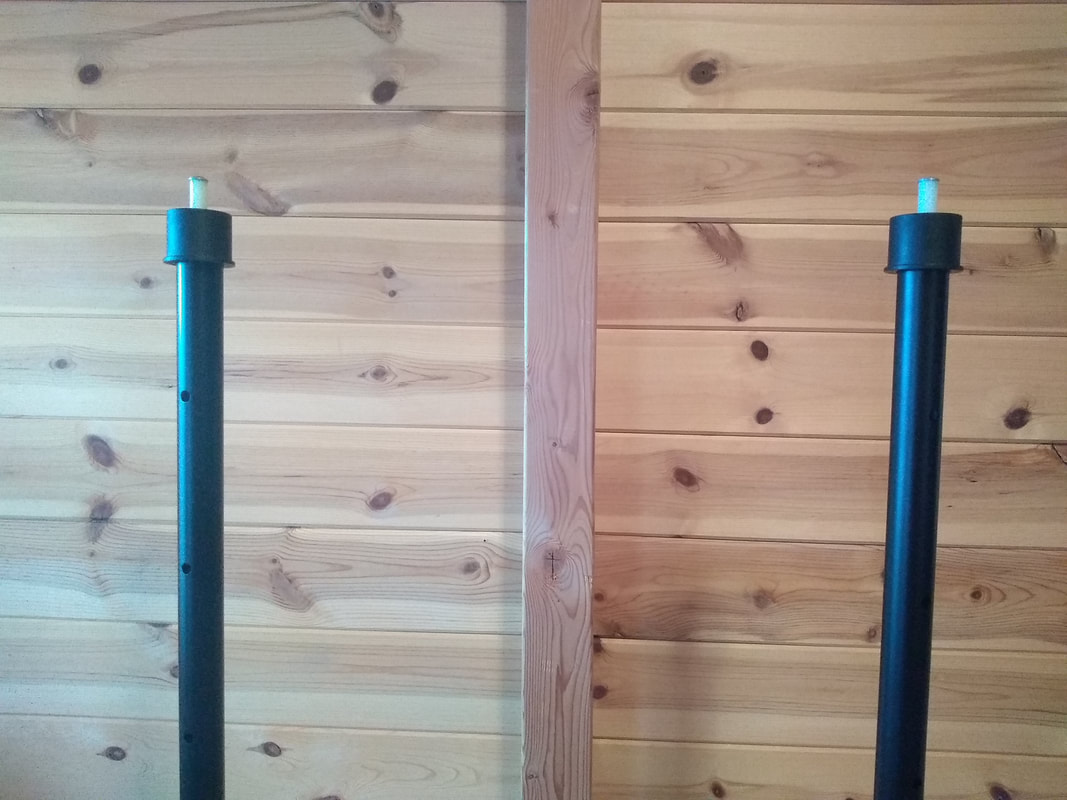
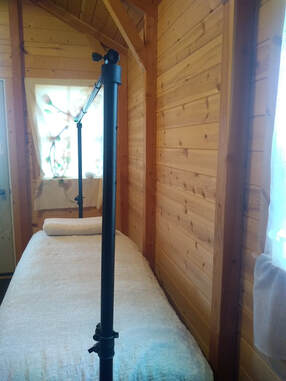
Loosen upper knob and pull up on post.
pull up to tighten knob to a secure non slip setting. 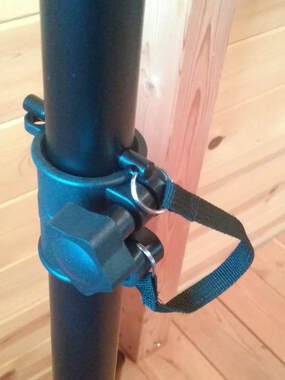
|
Make sure posts are at the same height.
|
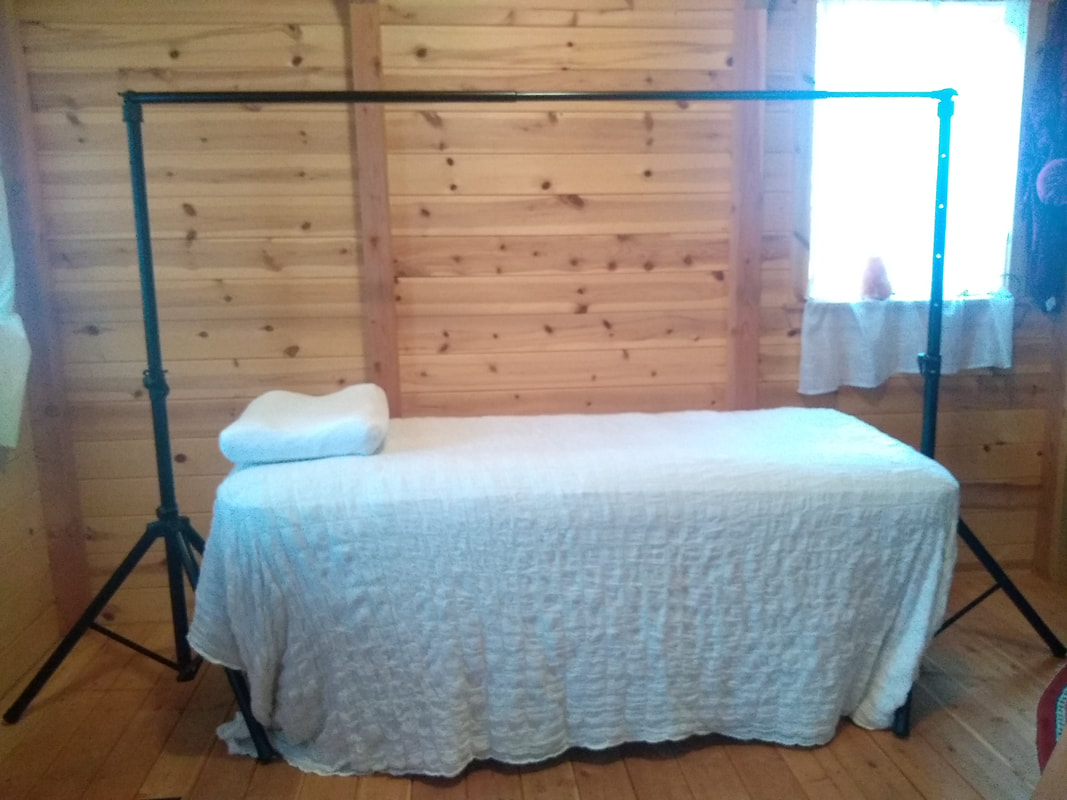
Bed - Step 2
Place massage in between the posts.
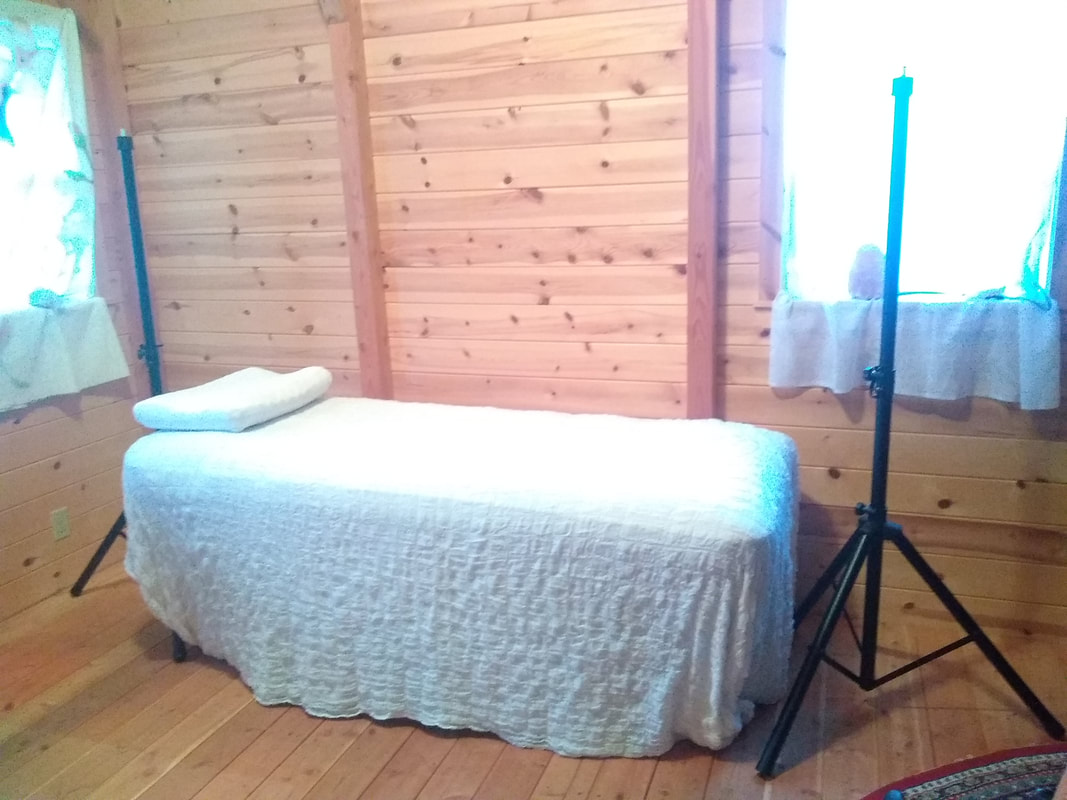
Double check and make sure that the posts are in the middle of the bed.
Cross-Bar - Step 3
|
As guidance and due to the weight of quartz crystal lights, do not extend cross-bar (a full 10 feet)to the end.
|
Crossbar has 3 sections, make sure each sectione is of same lenth. Give crossbar a slight twist to tighten, (like a shower rod).
|
|
Aim thicker cross-bar-end to the head side of the bed, due to crystal beam weight!
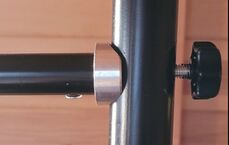
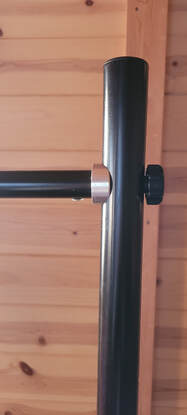
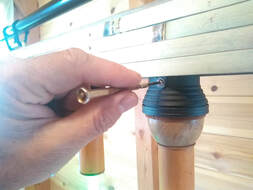
Loosen screws on cross-bar, slip cross-bar over white peg, then tighten knob to a secure non slip setting. 
|
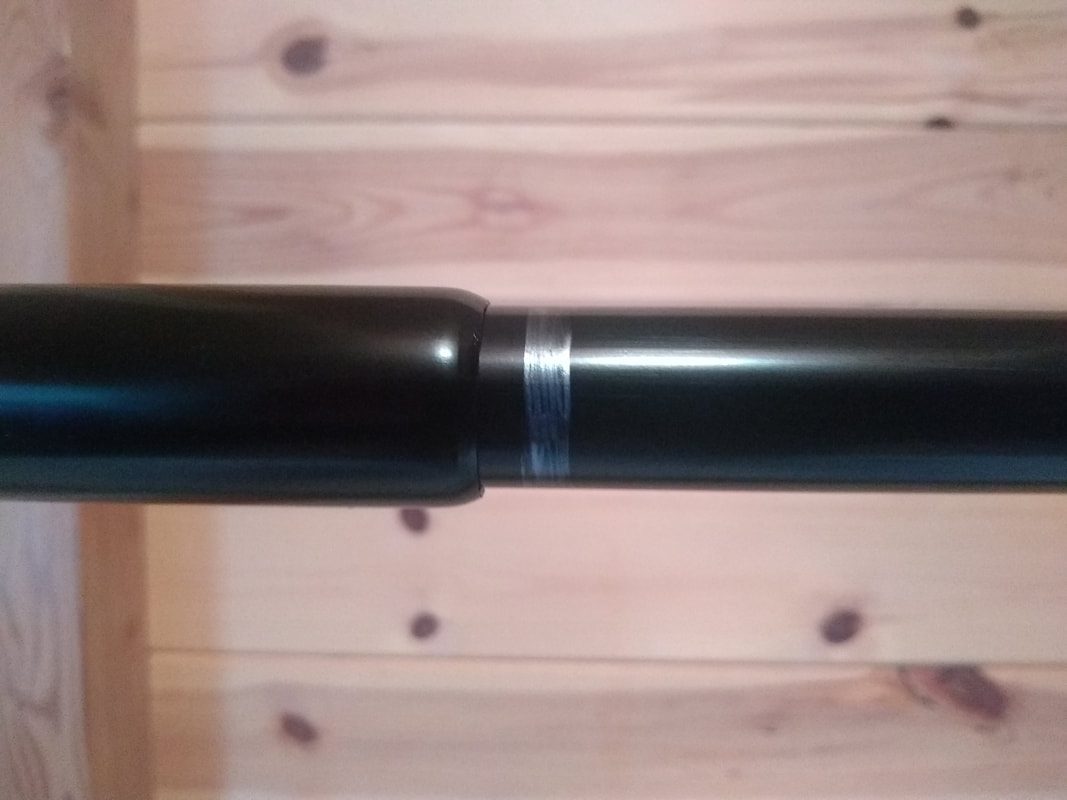
There are various types of posts and how the crossbar attaches. Please contact us if there are questions.
|

|
Double check: make sure that the posts and crossbar are level.
|
Make sure that the posts are situated in the center of the bed.
|
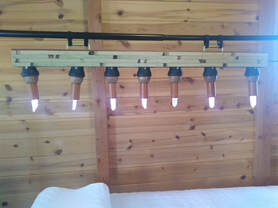
Crystal Lights - Step 4
This is an instrument, instruments are always treated with regards to sensitivity.
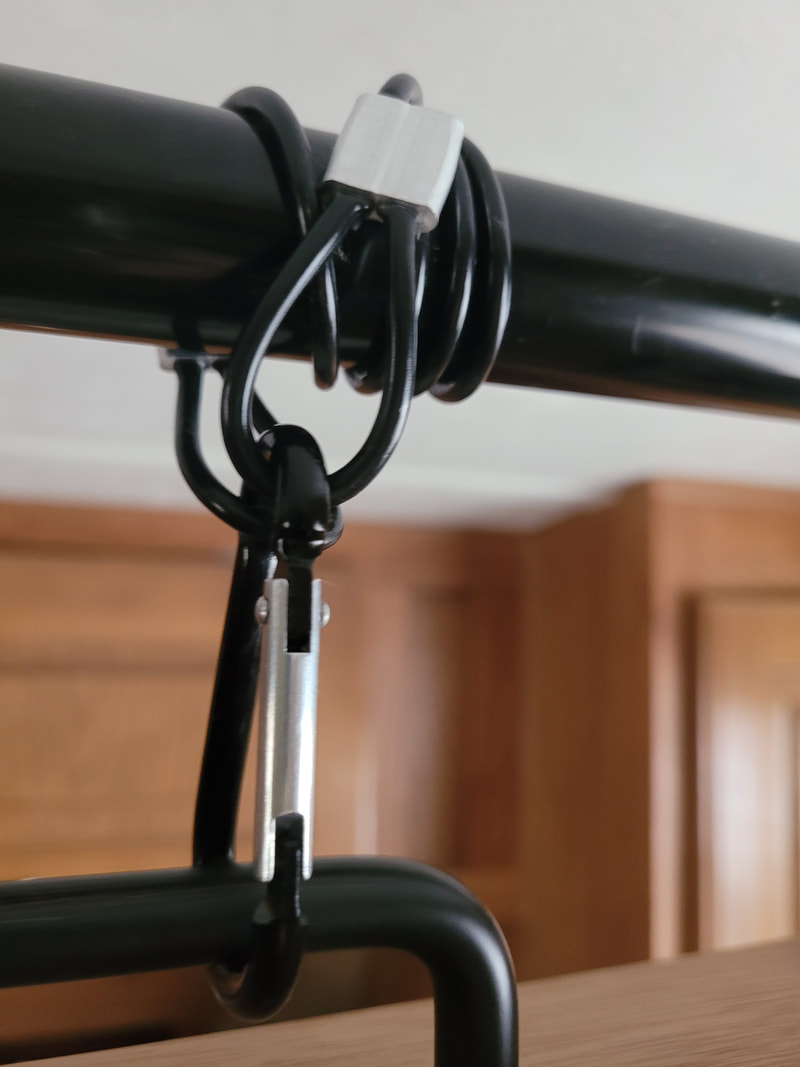
FIRST: Place 2 S-Hooks onto the thickest and middle part of the crossbar.
For security of unit and crystals use S-hooks every time you set up or take down crystal light beam!
FIRST: Place 2 S-Hooks onto the thickest and middle part of the crossbar.
For security of unit and crystals use S-hooks every time you set up or take down crystal light beam!
|
A
Place the carry-case with the handle towards you (Sticker UP) onto the bed or massage table. Handle towards you means: that on the right side is the purple crystal light for the crown chakra, and on the left side is the red crystal light for the root chakra and also the electric cord to be be plugged in. 
|
B
Firmly grab the handles and Bamboo beam, place thumbs underneath onto the bamboo. Lift/pull crystal light out of case, maybe have someone push down the foam padding. 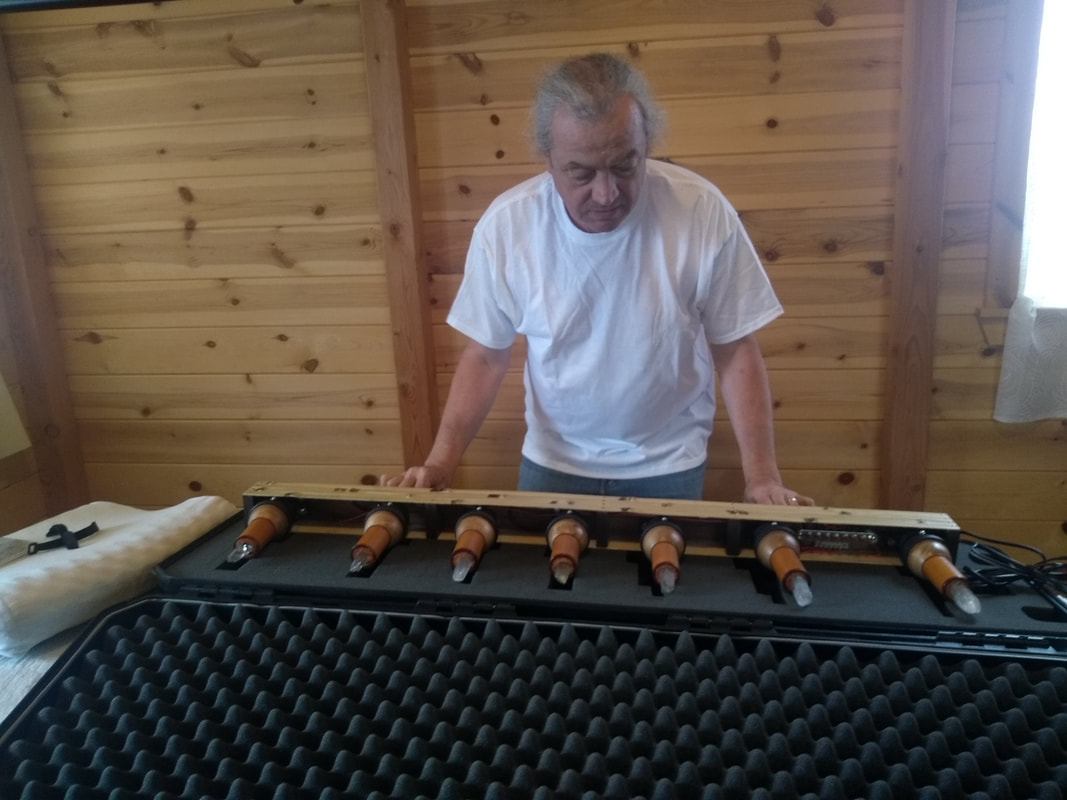
|
C
In a lift-pull-lift-pull motion raise the crystal lights out of the padded box. Always remember that you don't want any weight to rest on the crystals. NO WEIGHT ON CRYSTALS! DO NOT LIFT ON CRYSTALS! 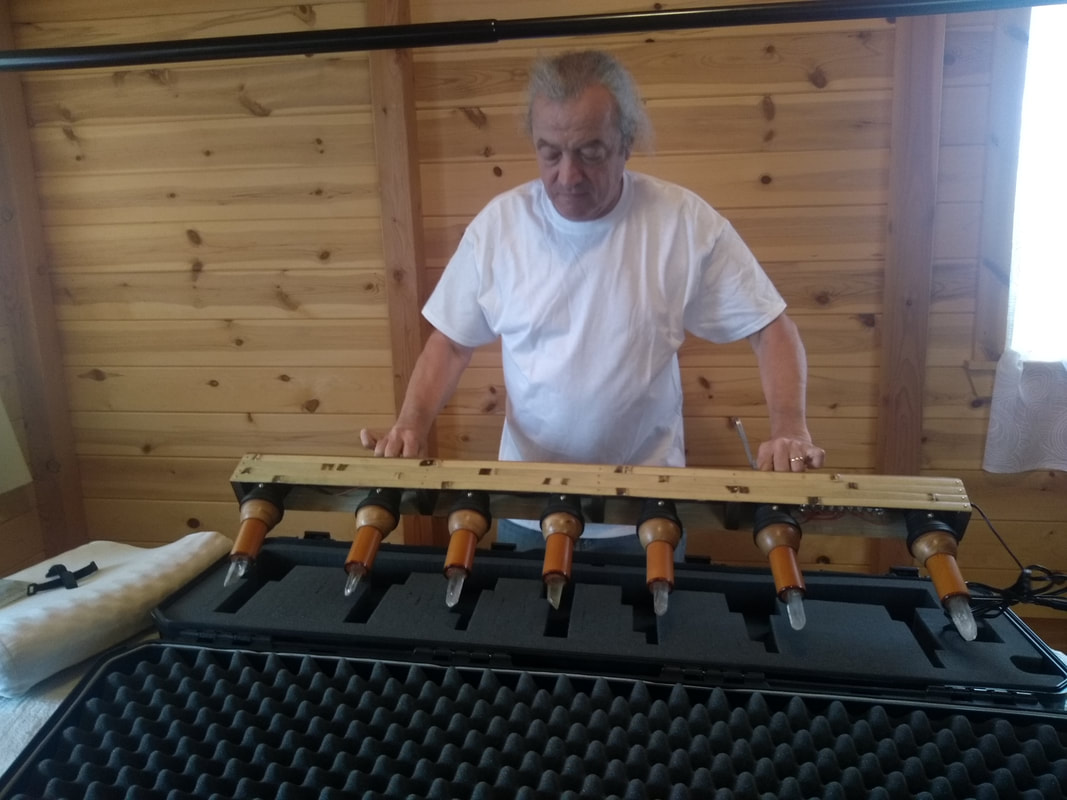
|
D
And then gently hang handles over and into the S-hook. The cross-bar will sag slightly in the middle depending on the weight of your crystal light beam. 
|
|
We switched from Velcro to the wire cable, but should you use Velcro hangers for your crystal beam lights, most important is that Velcro is pushed together VERY FIRMLY!
If not, it can pull loose and the lights will drop and crash! It happened to me at a show, I was scared to death, but the well built setup allowed for easy fixing. Make sure Velcro is pushed together firmly, and check from time to time. 
|
This way all other lights can be adjusted accordingly to be very effective for your purpose of use. 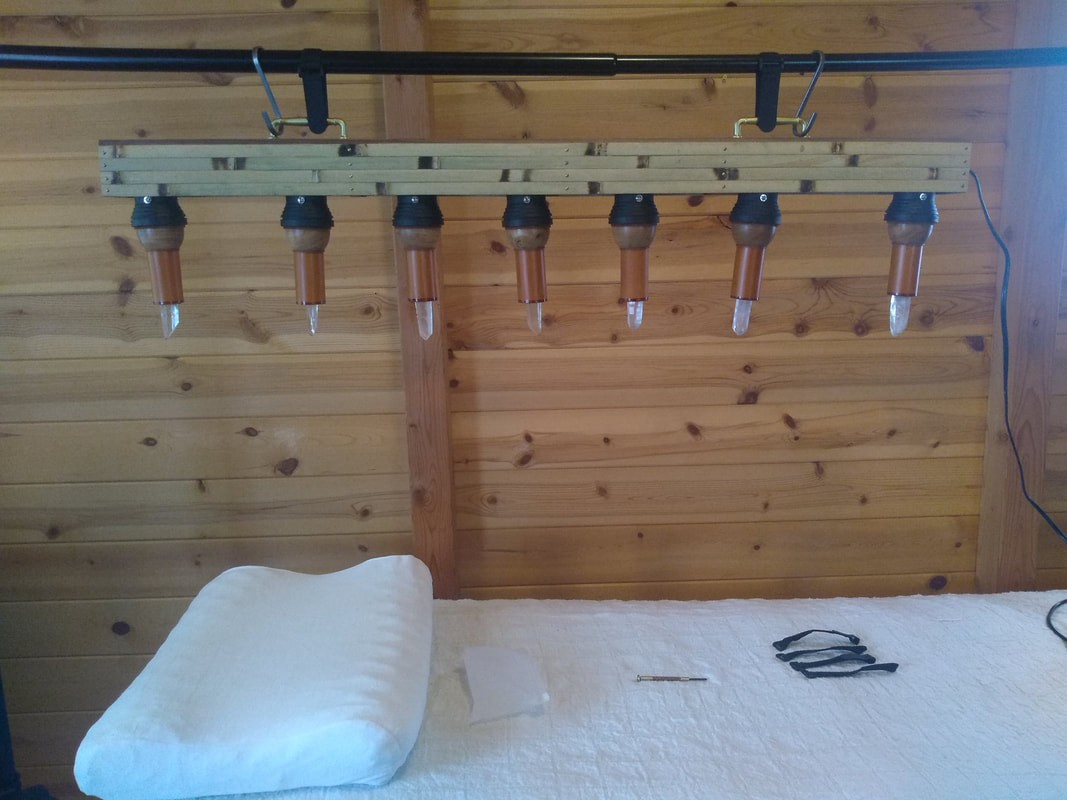
|
Ceiling Mount
By mounting e crystal light beam to the ceiling The THROAT CHAKRA LOCATION is the important spot to be correctly aligned! Keep in mind Ceiling mounting points are non movable (meaning, sliding from feet to head) . 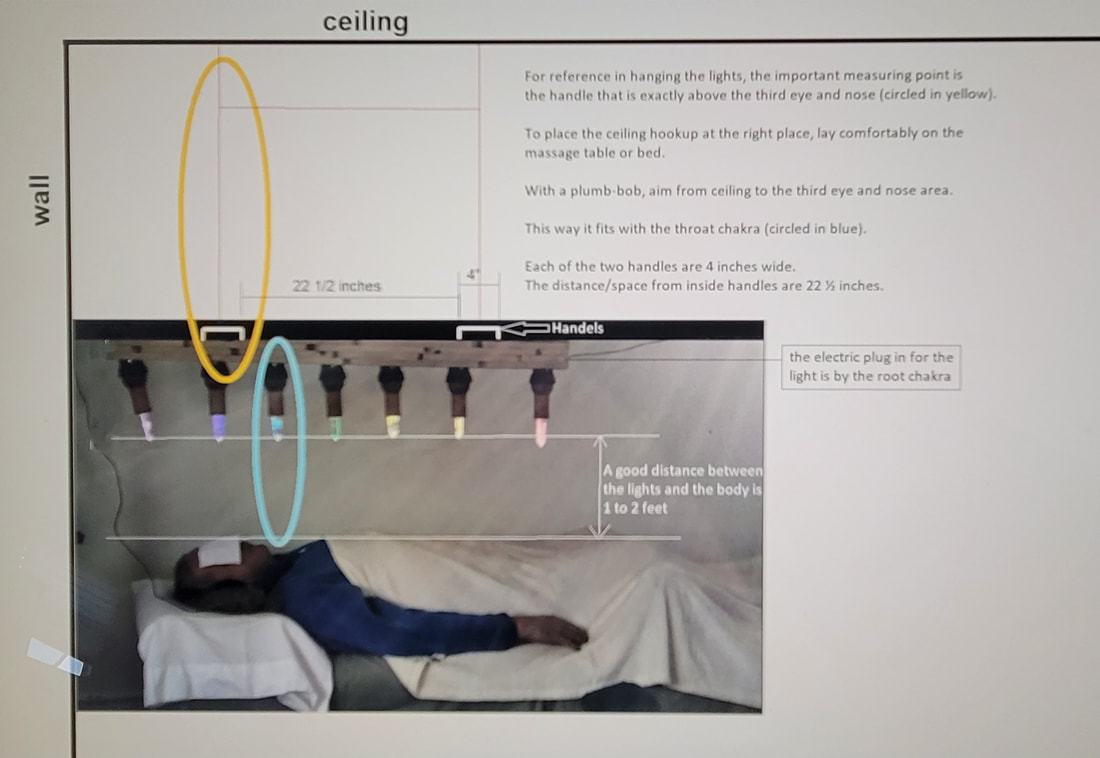
|
Power - Step 5
|
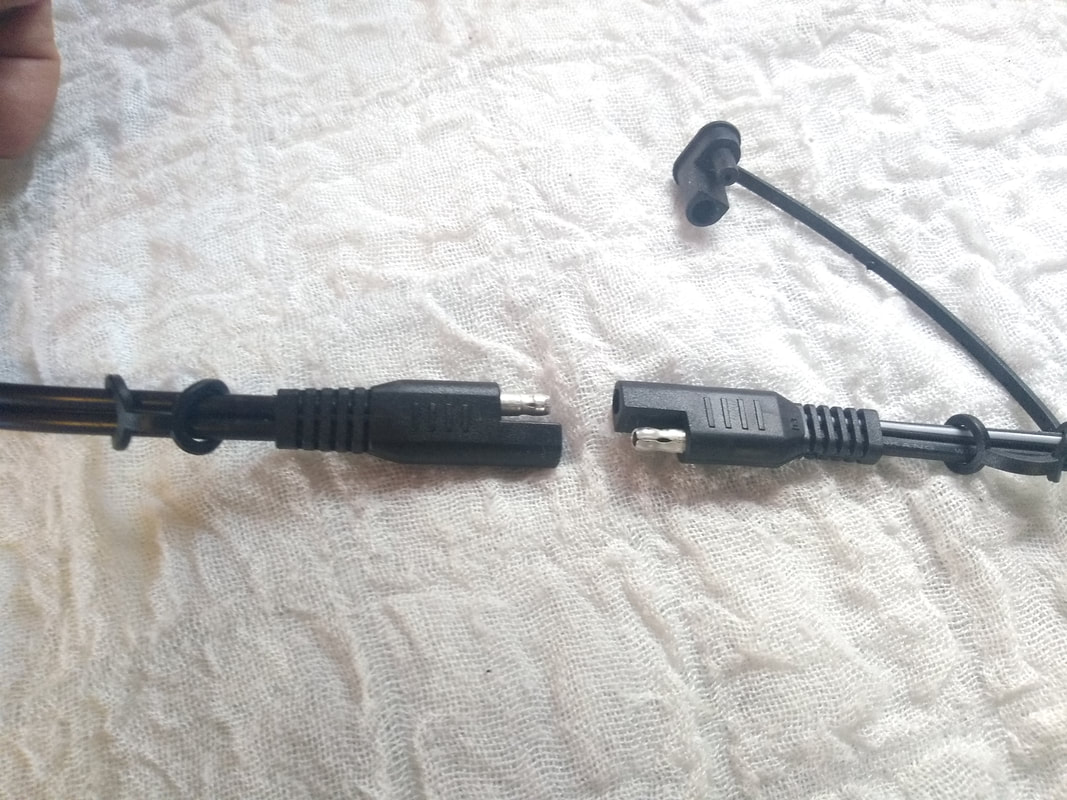
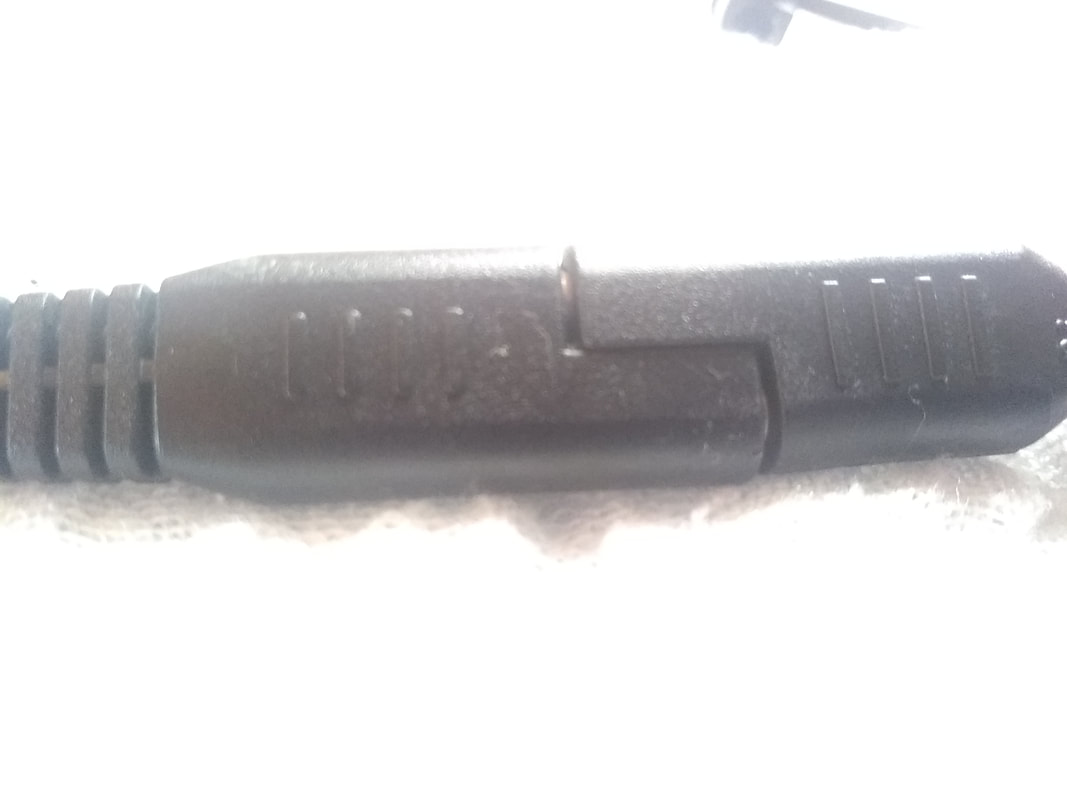
Open the flat two post plug.
(This is an upgraded system plug-in, so the user can adapt a 12 volt battery power supply or a 100 watt solar panel later. Please inquire for more information and assistance to change this over). 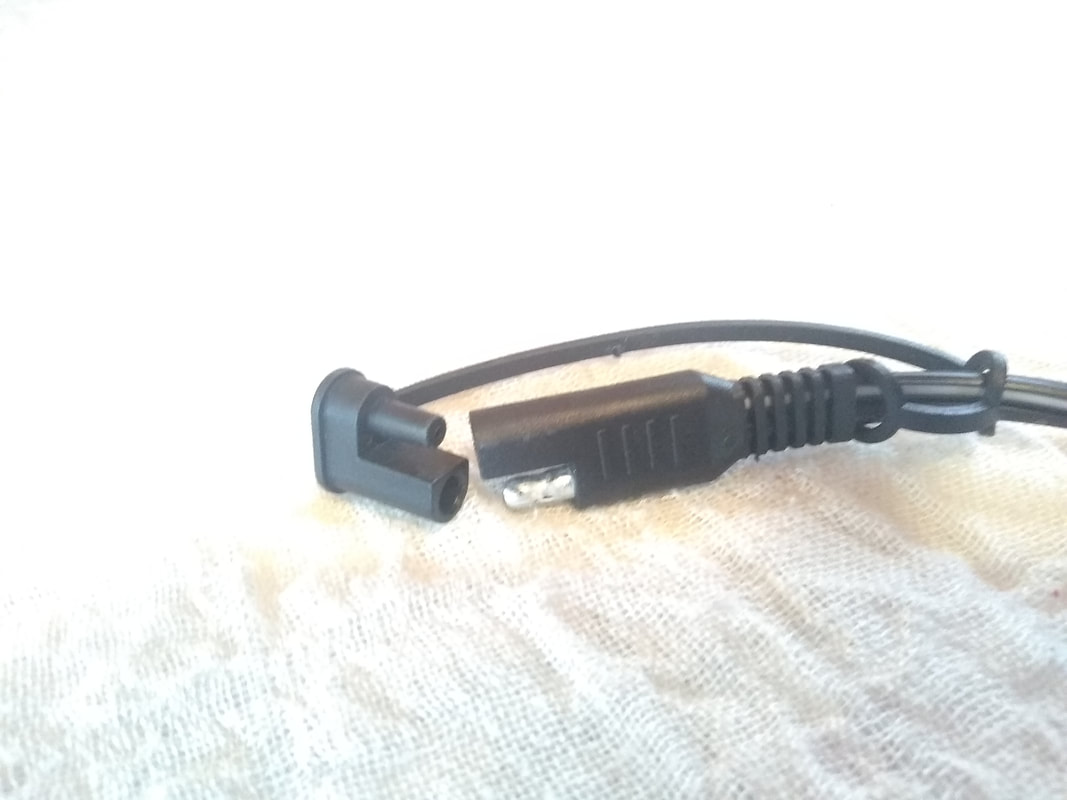
|
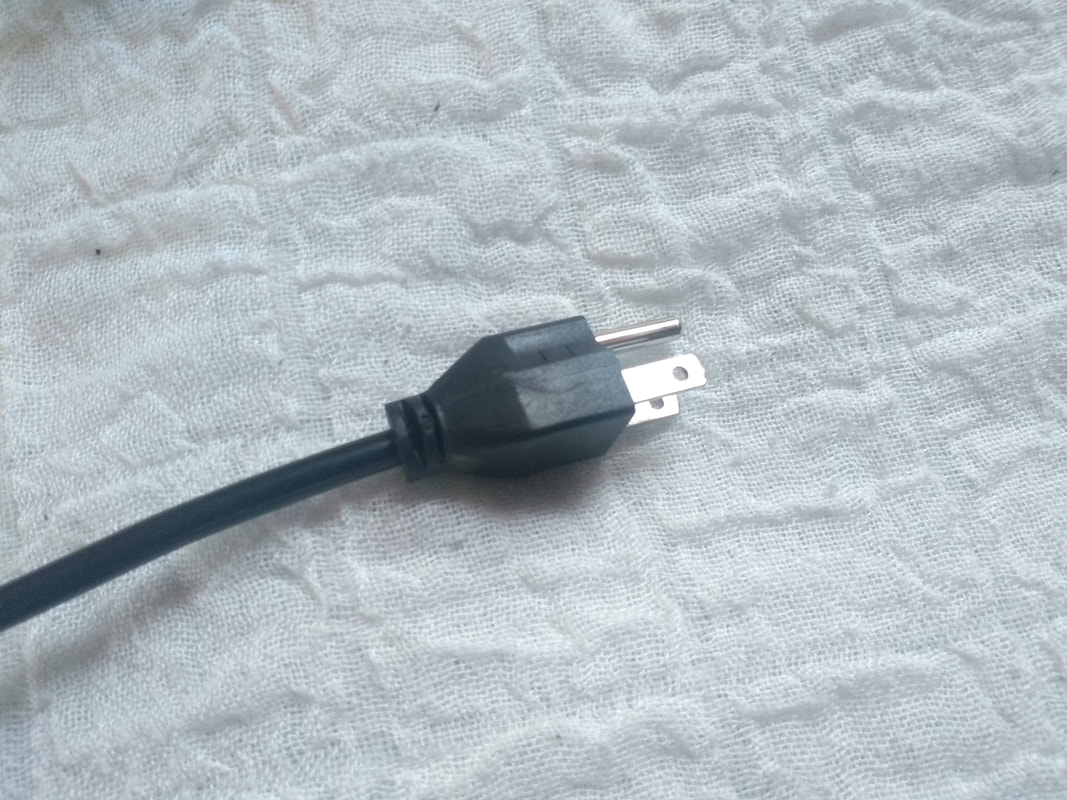
Plug in the 25 foot long cable to the light bar.
Aim straight to plug in, at an angle the prongs might brake off. 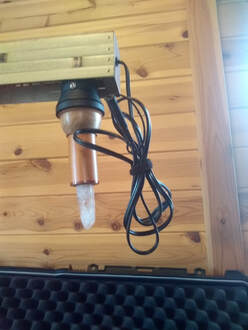
|
Then plug the other end into the power pack/Transformer.
This way it can run on household electricity. 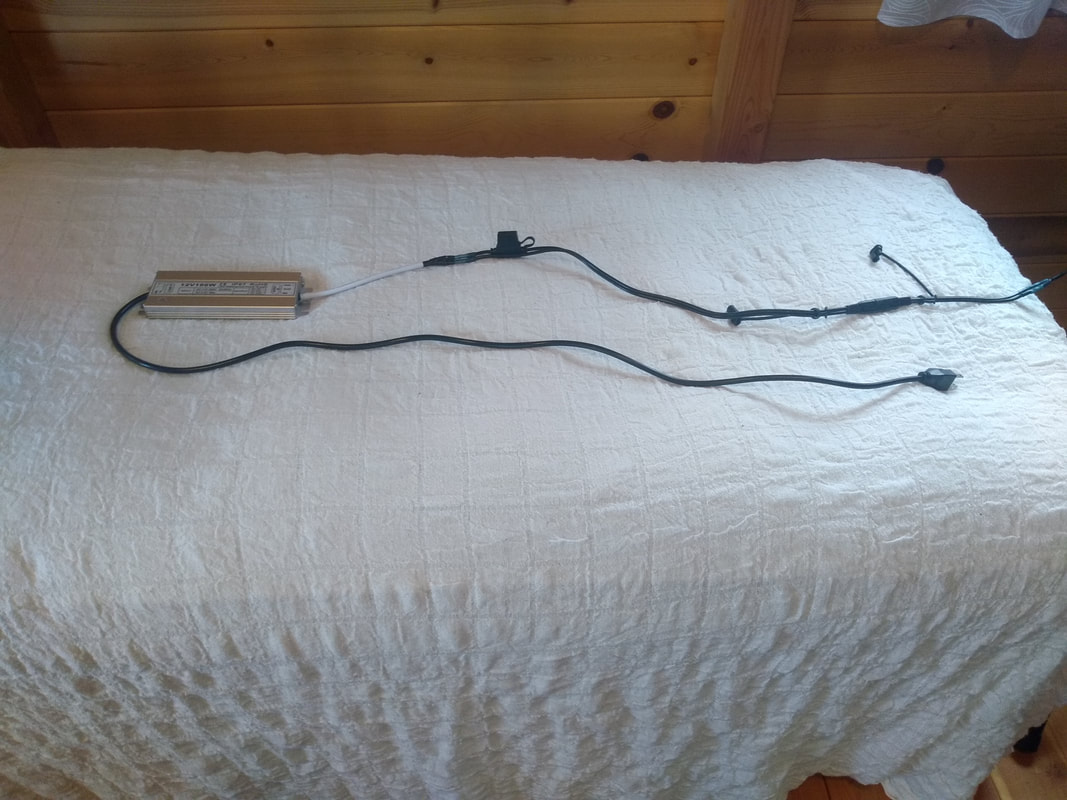
|
|
Push the ends fairly tight together to get a good connection.
Plug the other end in to the wall outlet.
|
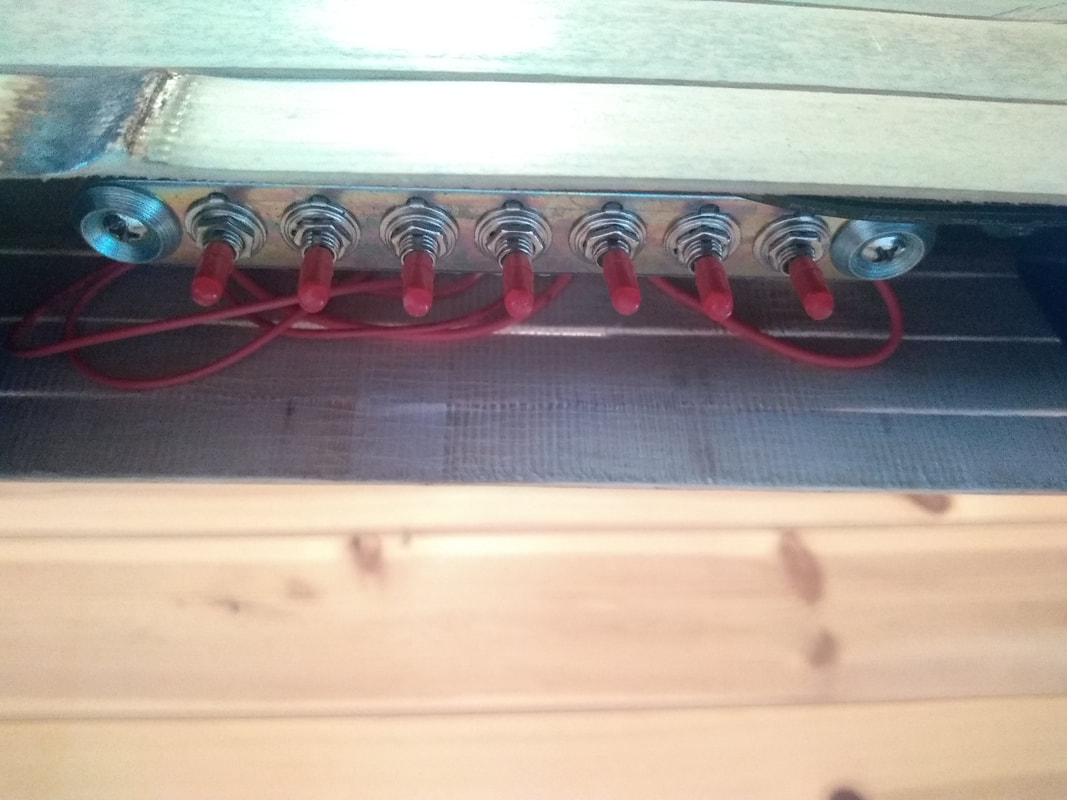
Switches to each individual light are located underneath the beam between the root and navel chakra lights. Primary colors use only one LED light, yellow for example uses multiple LED's for mixing to correct color, therefore you might experience a warmer light fixture if your device is in use all day long without turning it off.The switches allow for individual turn off/on.
|
Attach electric cord to frame with the last 2 Velcro strips.
Make use of the power strip Velcro as well. When plugged in and running on 7 different colors you get: - Color Therapy - Light Therapy - Chakra Balancing - Orgonite Amplification - Crystal Healing Power When device is UN-plugged and NOT running you still get: - Orgonite Amplification - Crystal Healing Power 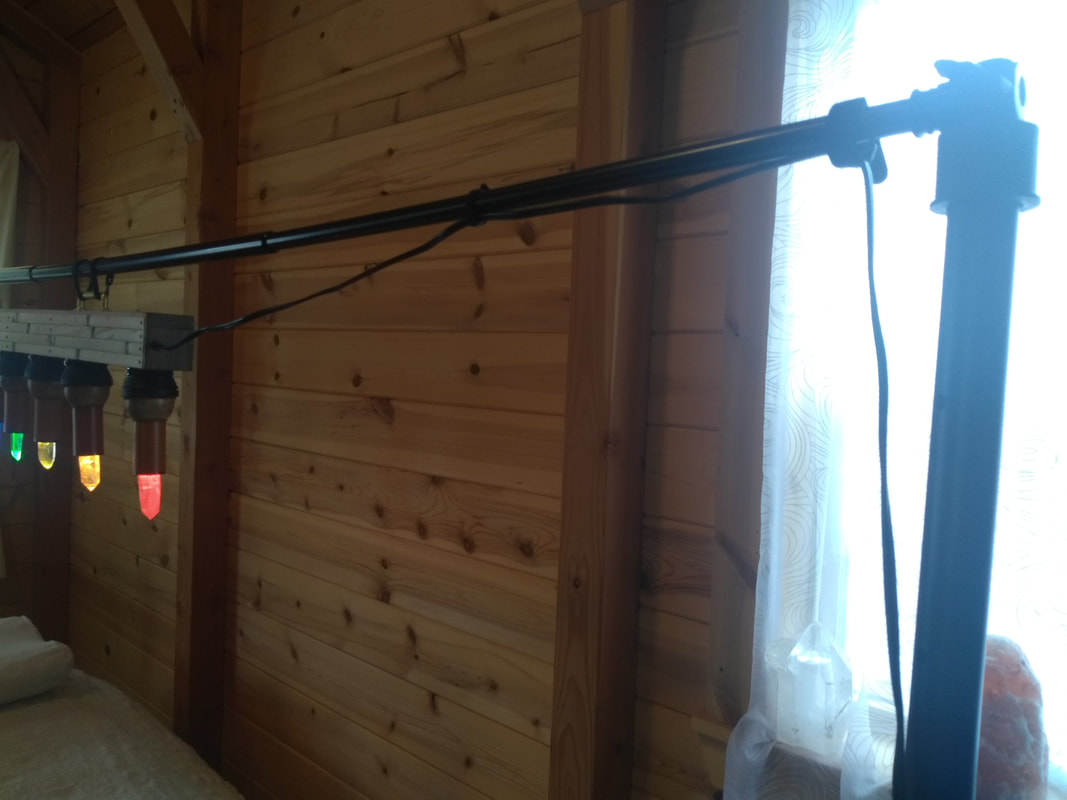
|
The Lights - Step 6
|
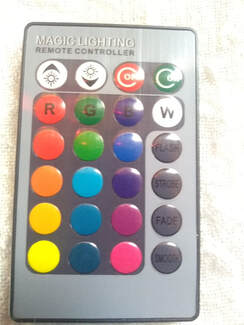
To change the color of the crystal lights, just press desired color and aim at the crystal or a bit higher, or directly underneath.
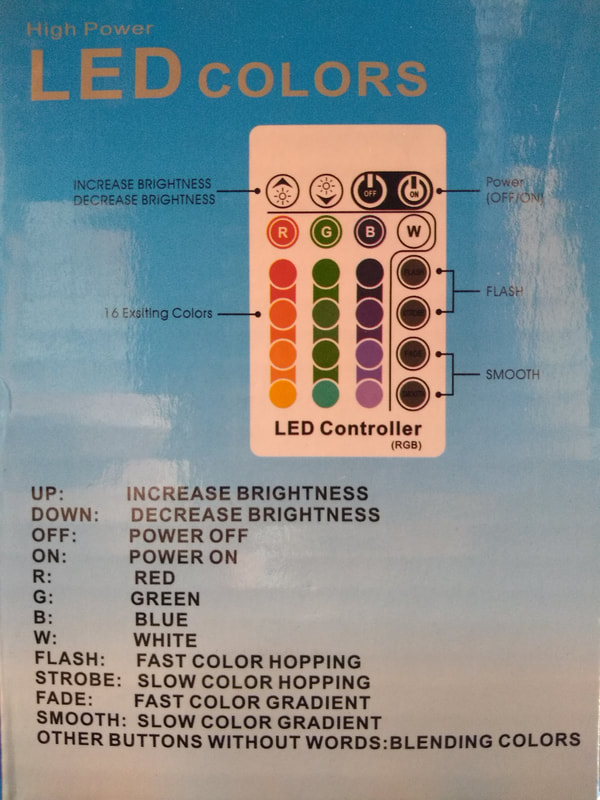
|
The lights can be switched to anything you desire, there is no wrong.
These settings are to serve all profession's chakra workers, color therapy practitioners and crystal light workers. 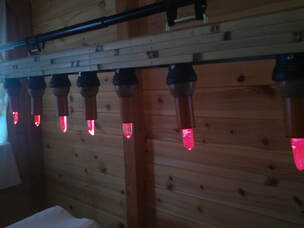
|

Crystals and their setting
|
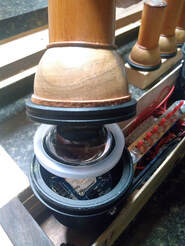
If you open up the lights for crystal cleansing, hold and turn metal ring to loosen and unscrew. Putting it back on, gently-gently go backwards first till you feel a slight drop in, then gently start screwing it back on. This way the fine threads will not be damaged.
|
Globe light provides bright illumination funneled through the quartz crystal.
Use caution when removing the light, all of them sit LOOSE in the light fixtures. Underneath the globe is a strong LED light, primary colors use only one LED light, yellow for example uses multiple LED for mixing to correct color, therefore you might experience a warmer light fixture if your device is in use all day long without turning it off. 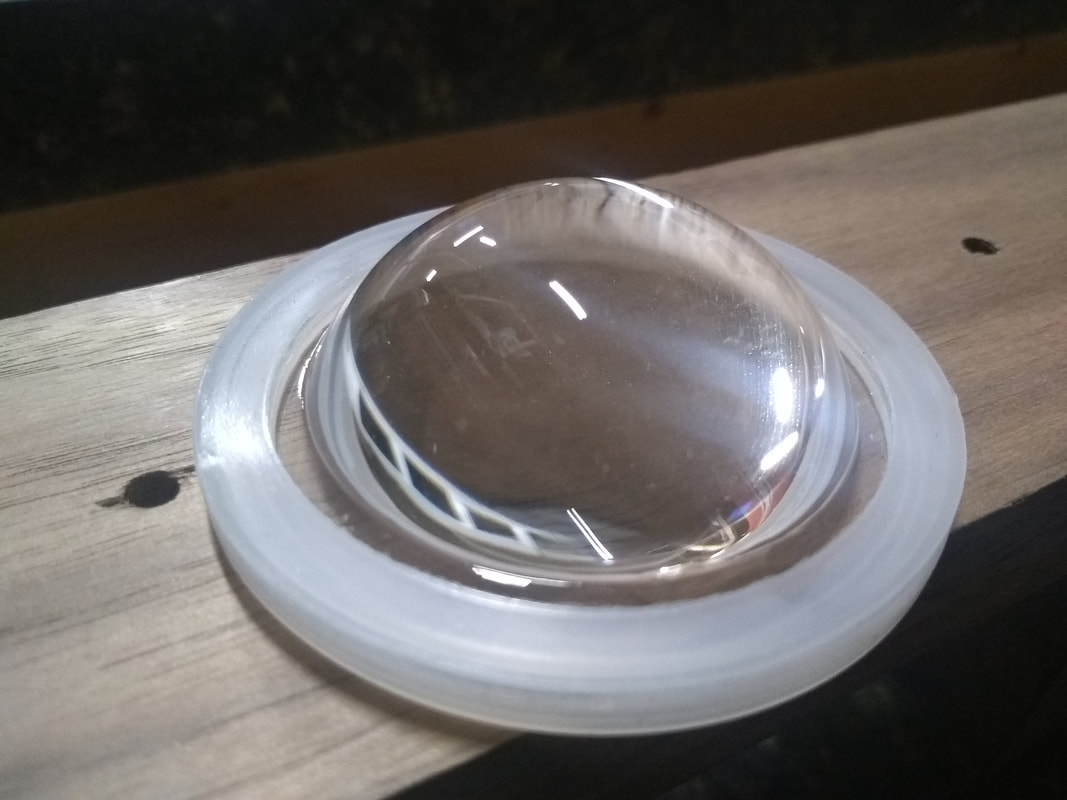
|
For sun- or moon light cleansing place the crystals with the holders on a large tray or set them in a basket with crystals facing upwards.
Please do not expose to moisture, rain or salt water! Do NOT remove the crystals from their holders or the orgone generator will need a complete resetting which takes quite the know-how and patience! 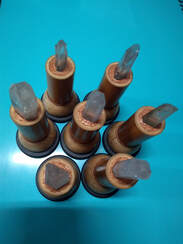
|
Inside the bamboo tube around the crystal is the orgonite amplification tool that transmutes negative energies into positive. This is also known as Chi, Prana, and Zero point energy. Orgonite raises the vibrational frequencies of the user and the surrounding area.
Orgonite crystal cleanses the environment and people of all kind of difficulties. 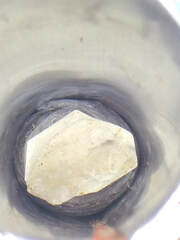
|
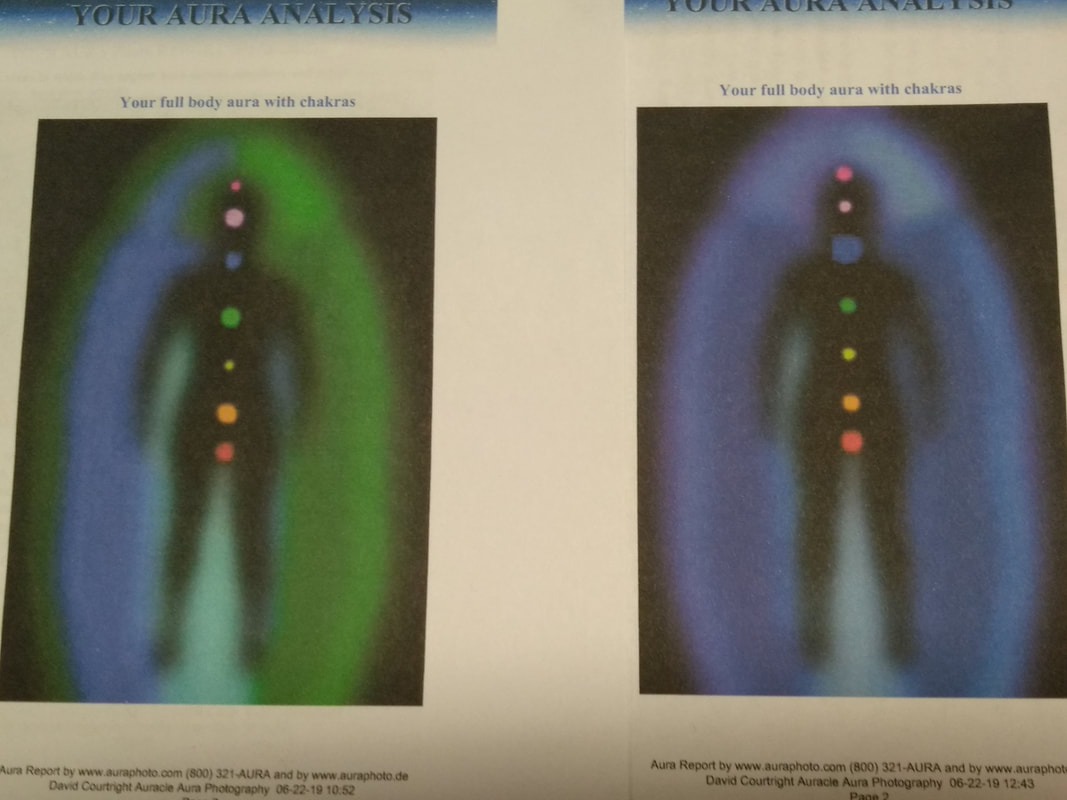
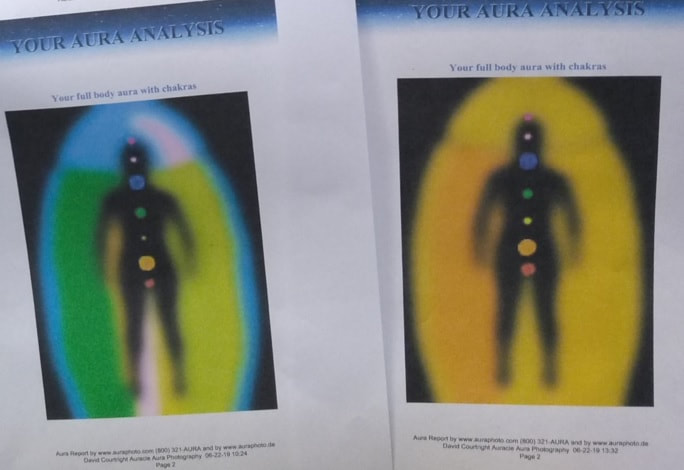
Aura Photography
On one of the shows we attended, the 'Aura Photography' booth was set up as immediate neighbor.
All of a sudden we were working together for the same good cause, wow what amazing results we witnessed after a 25 to 30 minute session!
Below are three photos, the picture on the left is before the crystal light bed and the picture on the right is after the light bed.
All of a sudden we were working together for the same good cause, wow what amazing results we witnessed after a 25 to 30 minute session!
Below are three photos, the picture on the left is before the crystal light bed and the picture on the right is after the light bed.
|
|

|
Another show we attended, the crystal bed was tested with a radionics reading machine. The increased energy reading after a crystal light bed for only 15 minutes was simply astonishing.
Crystal Cleansing Methods
It is a good idea to cleanse your crystals when you first acquire them. This will remove any energy from whomever handled the crystals before you. Beyond that, the frequency in which you cleanse them will be based a lot on how often you work with the crystal as well as your intuition. If you feel your crystal needs to be cleansed, if it is not working as well as it was for you before then give it a little energetic cleansing. Remember, this is something you can do any time. There is no such thing as too much, especially when you use safe methods such as sound, lunar energy, or Reiki.
528 hz frequency healing music sound is our absolute favorite way to cleanse crystals. We do it on a daily basis while working with our crystals. We also use use a tuning fork on every single crystal just before going to a show, or shipping them off to our customers. Many have noticed the difference!
528 hz frequency healing music sound is our absolute favorite way to cleanse crystals. We do it on a daily basis while working with our crystals. We also use use a tuning fork on every single crystal just before going to a show, or shipping them off to our customers. Many have noticed the difference!
|
|
MOON LIGHT
I have not yet met a crystal that does not enjoy the moon light. The best time is during a Full Moon. The strong full moon energy actually lasts for 3 days, so it's ok if you miss the actual day of a full moon. You can catch those moonlight rays on the day before, day of, and day after a full moon. 
SUN LIGHT
Many clear quartz crystals love to sun bathe. You can put them out in the sun for an hour or two for a cleansing and recharge. Most of the Crystal cleansing text was extracted from crystalguidance.com |